GitLab Kubernetes Agent
In modern software delivery, automating deployments to production is a core priority. GitLab provides an all-in-one DevOps platform, while Kubernetes orchestrates container workloads. Combining the two is common, but secure integration and access management still require careful design.
GitLab addresses this need with the GitLab Kubernetes Agent, which establishes encrypted communication between GitLab and a Kubernetes cluster without storing a kubeconfig or long-lived cluster token in the CI/CD repository.
What Is the GitLab Kubernetes Agent? The GitLab Kubernetes Agent runs inside the Kubernetes cluster and establishes an encrypted, bidirectional connection to GitLab through the Kubernetes Agent Server (KAS). This enables features such as:
- Automated deployments from GitLab pipelines to Kubernetes
- Pull-based GitOps synchronization, where the agent pulls configuration from GitLab and applies it to the cluster
- Flexible, secure, centralized access management through GitLab and Kubernetes
KAS Architecture at a Glance
- GitLab Kubernetes Agent (
gitlab-agent) is deployed as a pod inside the Kubernetes cluster. - Kubernetes Agent Server (KAS) is the server-side component operated by GitLab.
- The agent and KAS communicate over gRPC (Google Remote Procedure Call) to protect communication integrity.
Advantages
- Stronger security: The Kubernetes API server does not need to be exposed publicly; the agent creates a tunnel to KAS.
- Fewer dependencies: GitLab provides the workflow without requiring additional tools such as Flux or Argo CD.
- Centralized access control: Use GitLab and Kubernetes RBAC rather than managing credentials in multiple systems.
- Straightforward operations: The setup focuses on GitLab and Kubernetes without an additional GitOps control plane.
Trade-offs
- More limited GitOps features: Without tools such as Flux or Argo CD, the built-in feature set is narrower.
- GitLab dependency: The agent is designed to operate within the GitLab ecosystem.
- More involved initial setup: Operators need a solid understanding of both GitLab and Kubernetes.
- Smaller community footprint: Flux and Argo CD have broader independent communities.
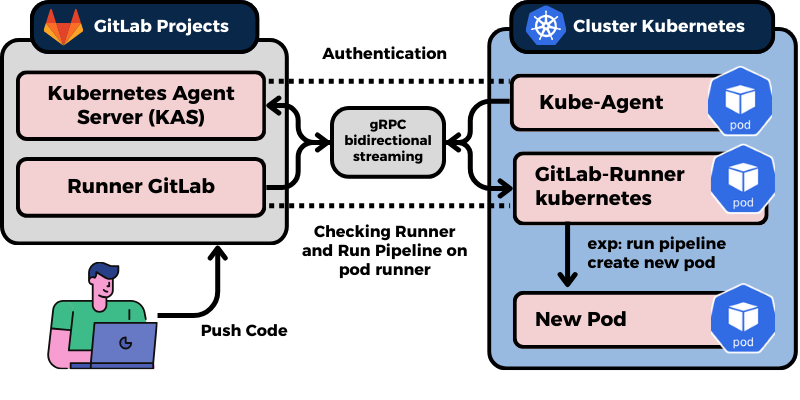
How It Works:
When a user pushes code to a GitLab project, the CI/CD pipeline is triggered after the agent authenticates with KAS. The Kubernetes GitLab Runner then executes the jobs defined in .gitlab-ci.yaml, such as creating a pod or inspecting existing workloads.
- Kubernetes Cluster
- GitLab Project
- Helm
- glab
- Docker
1. Create a Kubernetes Cluster
For a multinode cluster, see the Kubernetes guide. This example uses minikube because it runs Kubernetes on a single, lower-specification node. Follow the official minikube documentation for the setup; the workflow is similar to a multinode environment.
2. Create a GitLab Project and Kube Agent
-
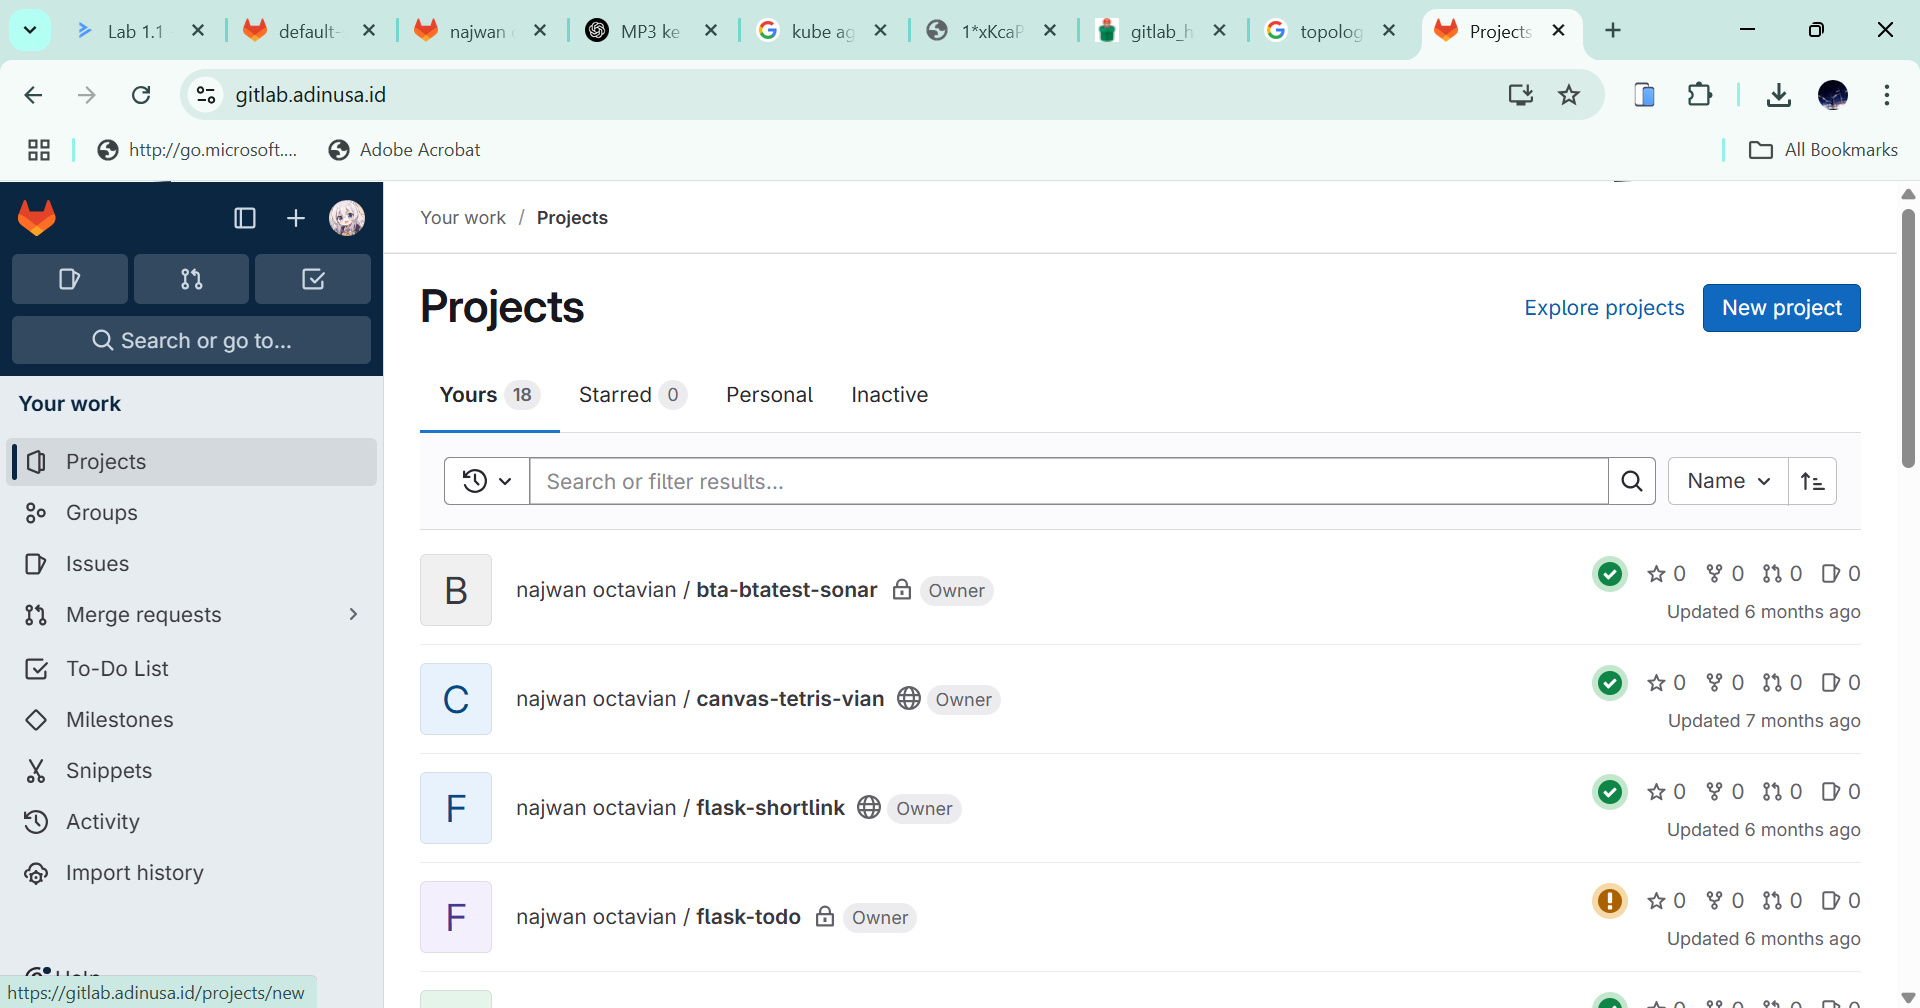
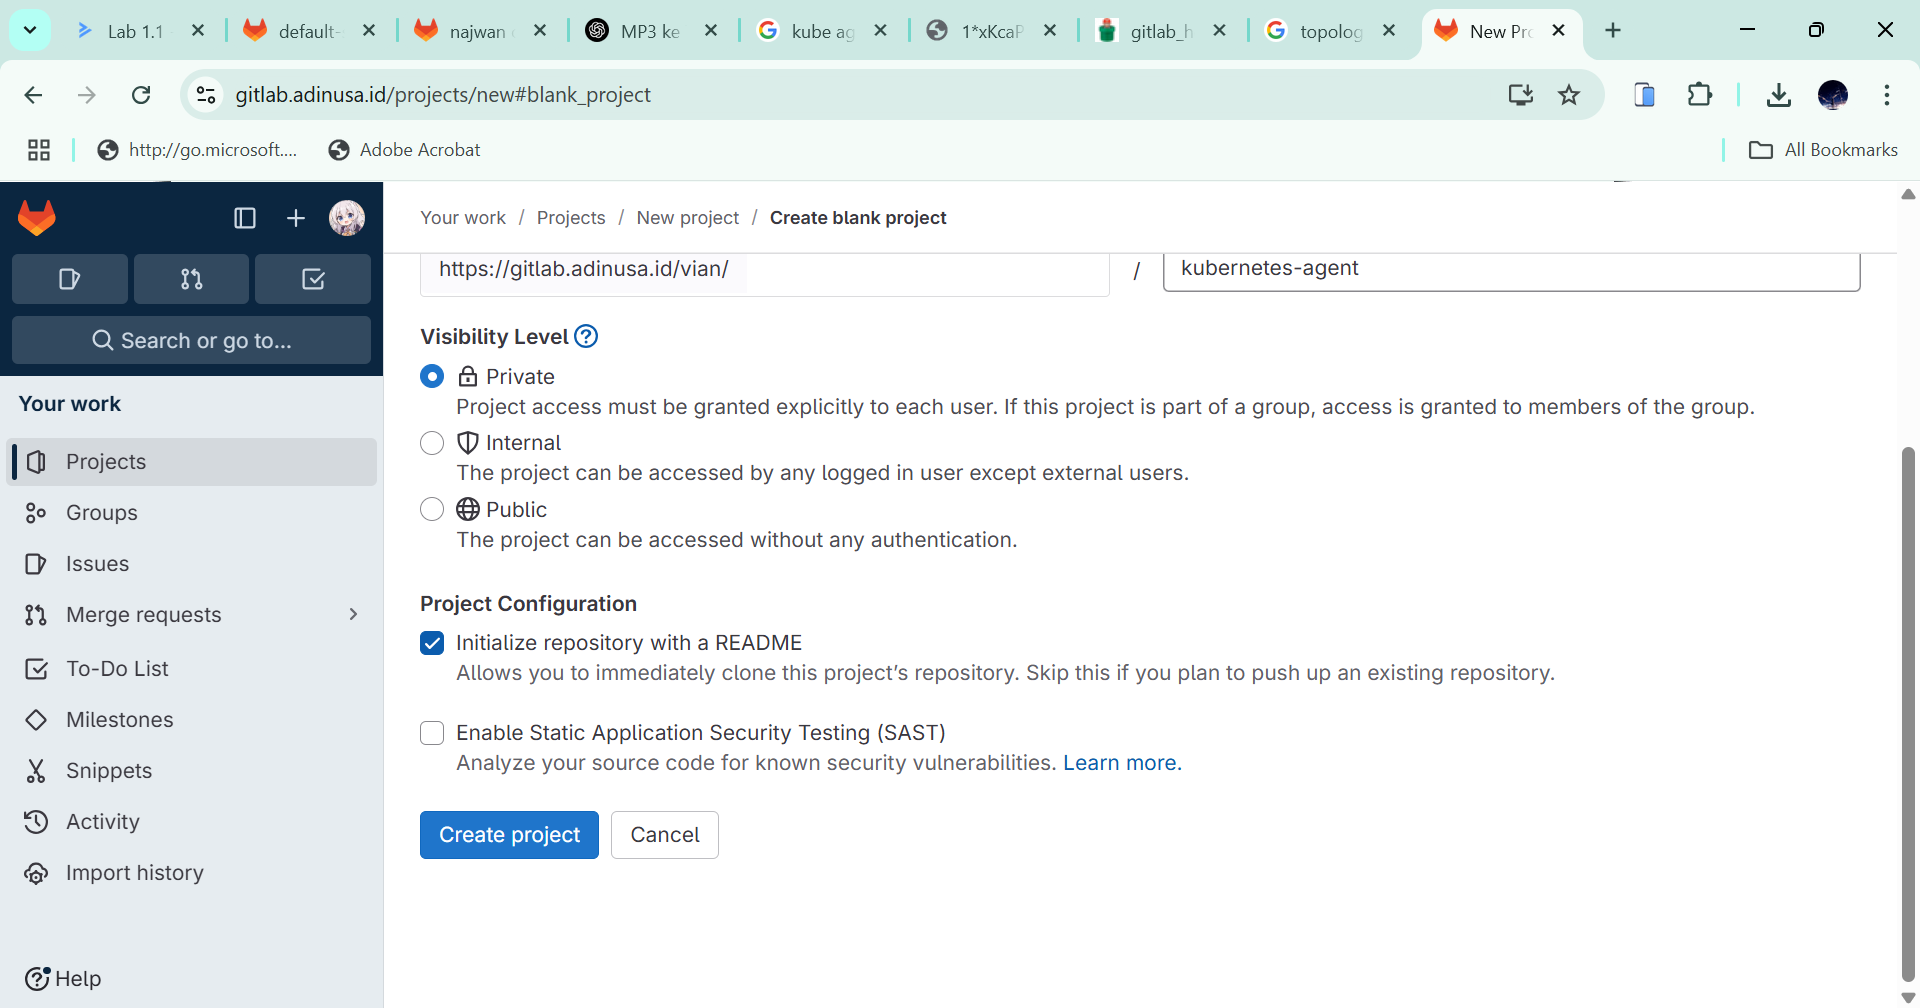
Open the GitLab dashboard and select "New project".
-
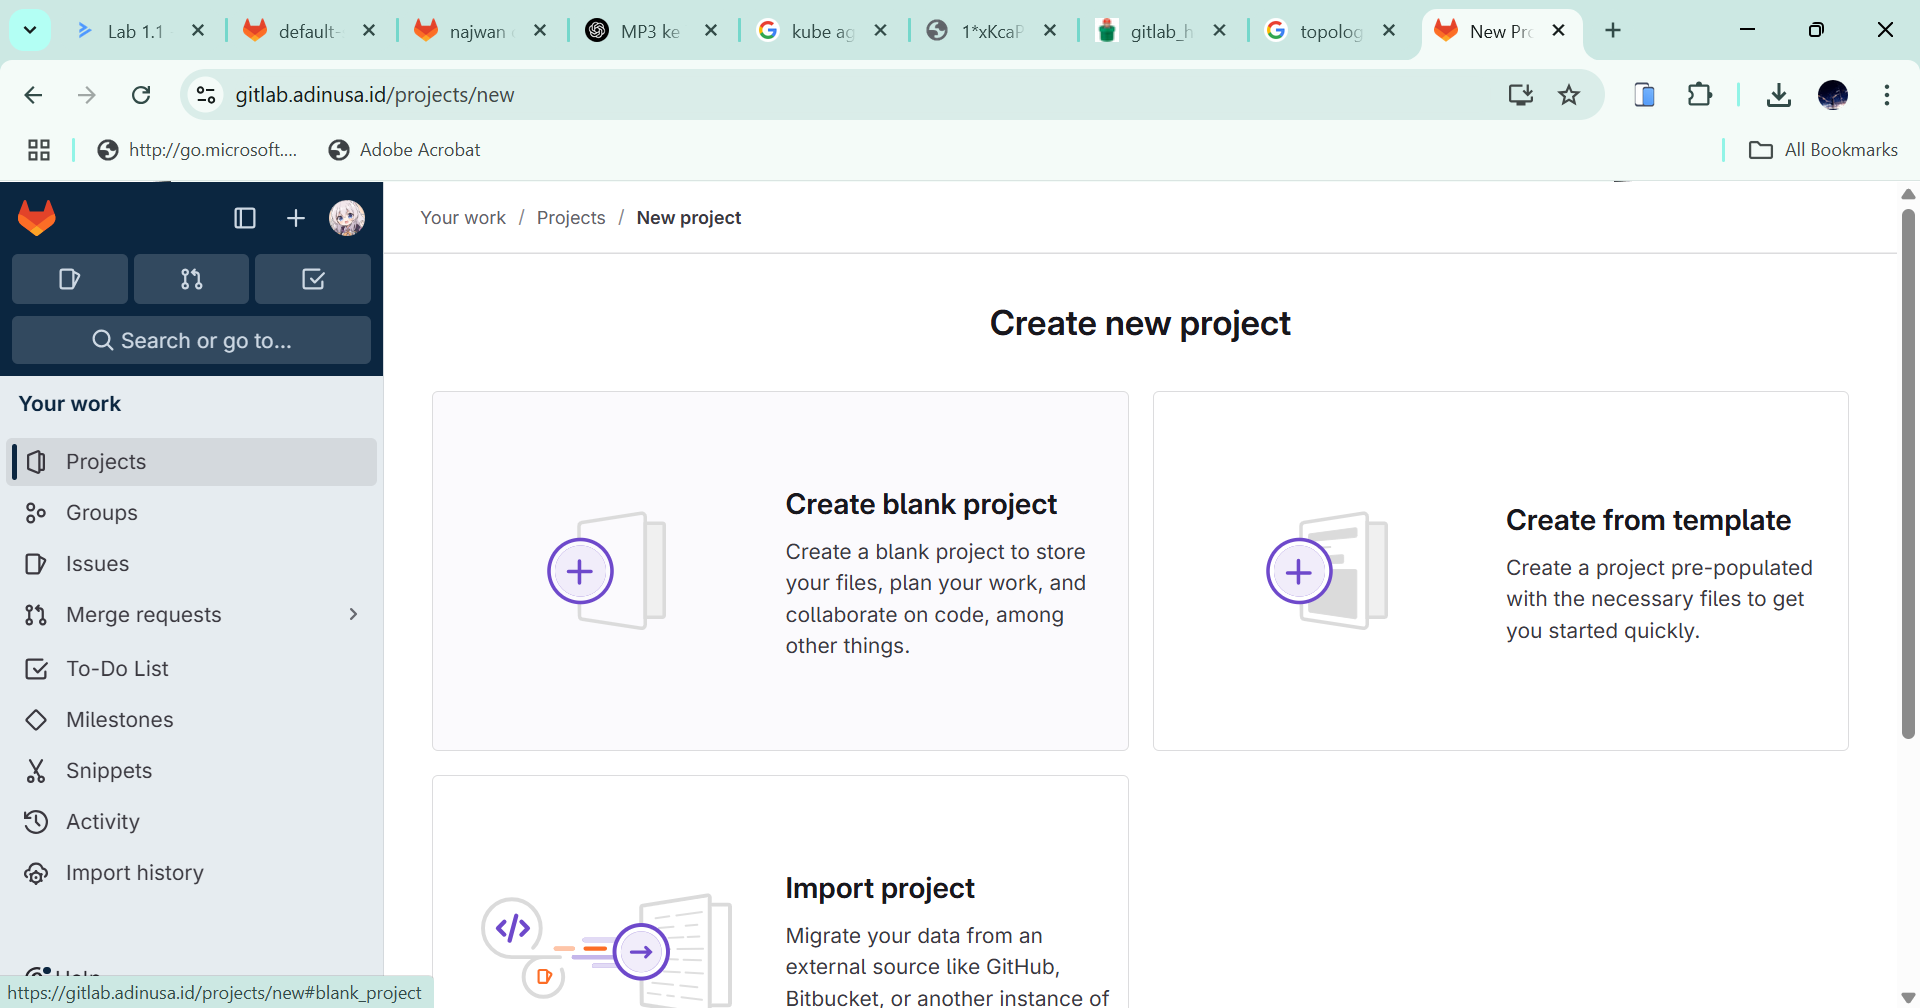
Select "Create blank project".
-
Enter a project name, such as
kubernetes-agent.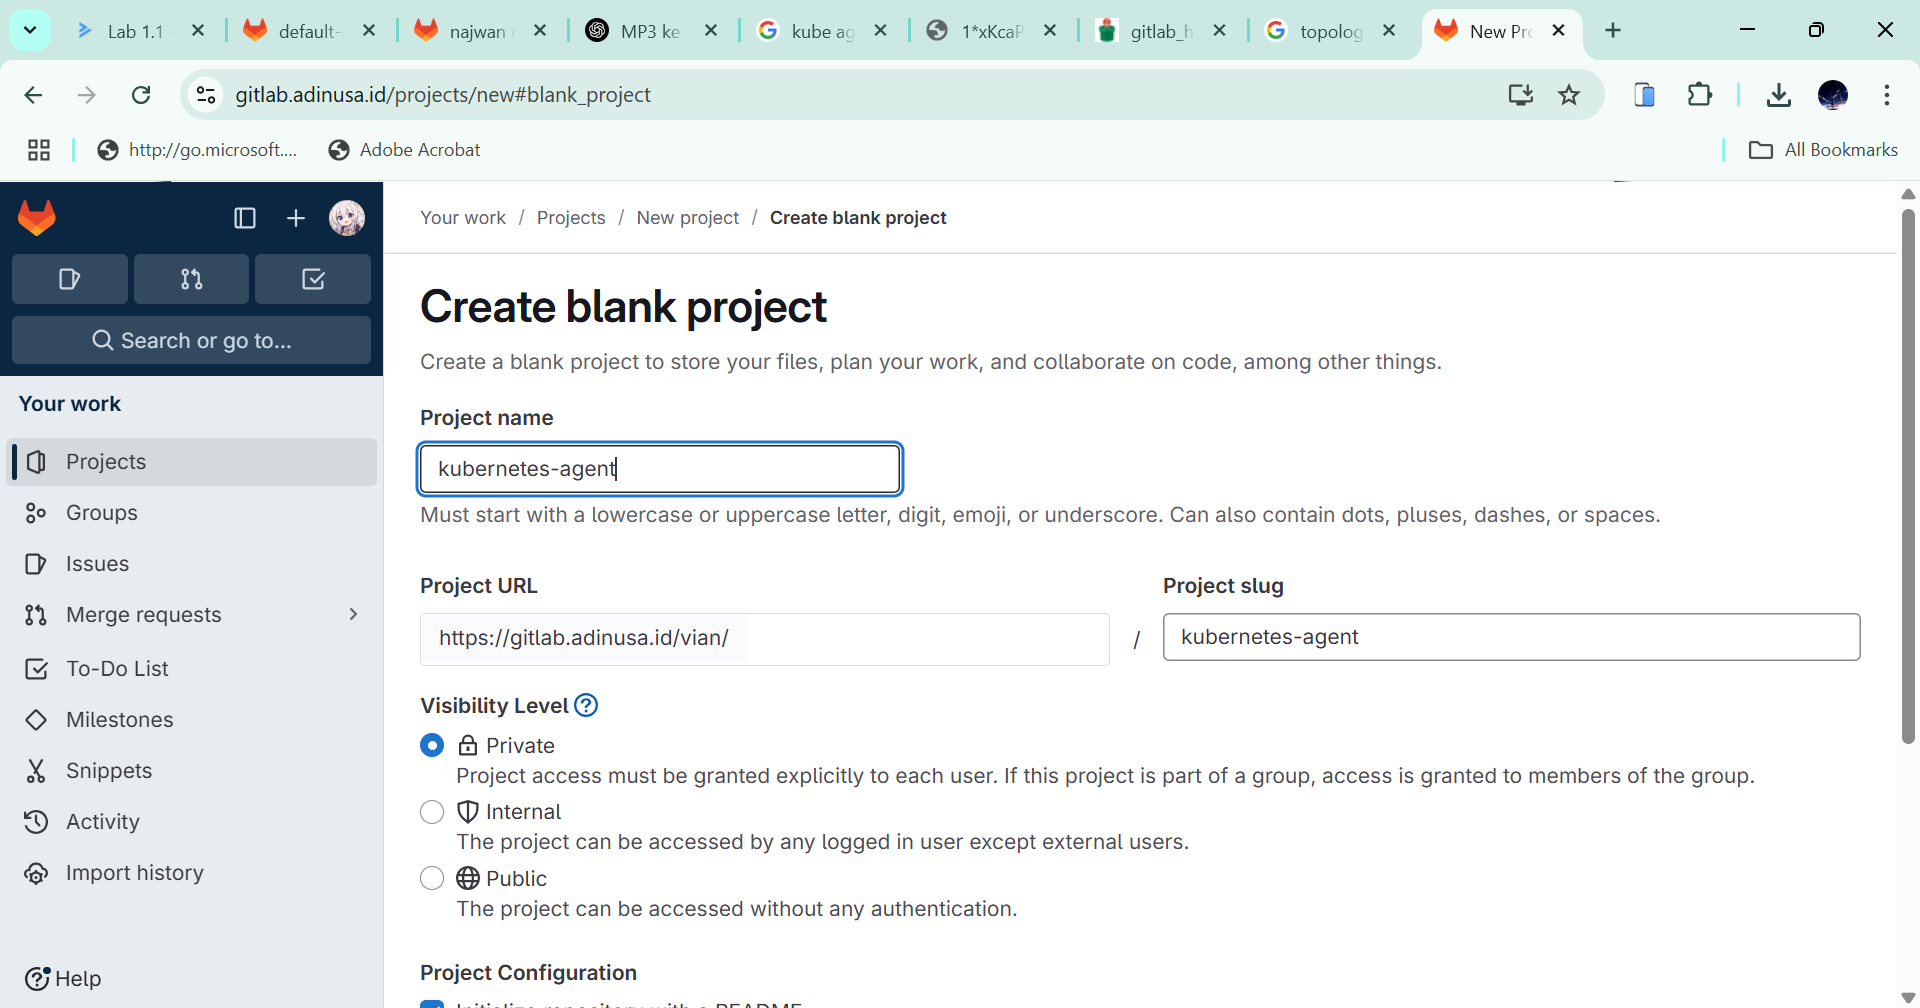
-
Choose the appropriate Visibility Level. Set the project to public or private, then select "Create project".
Create the Kube Agent in GitLab
-
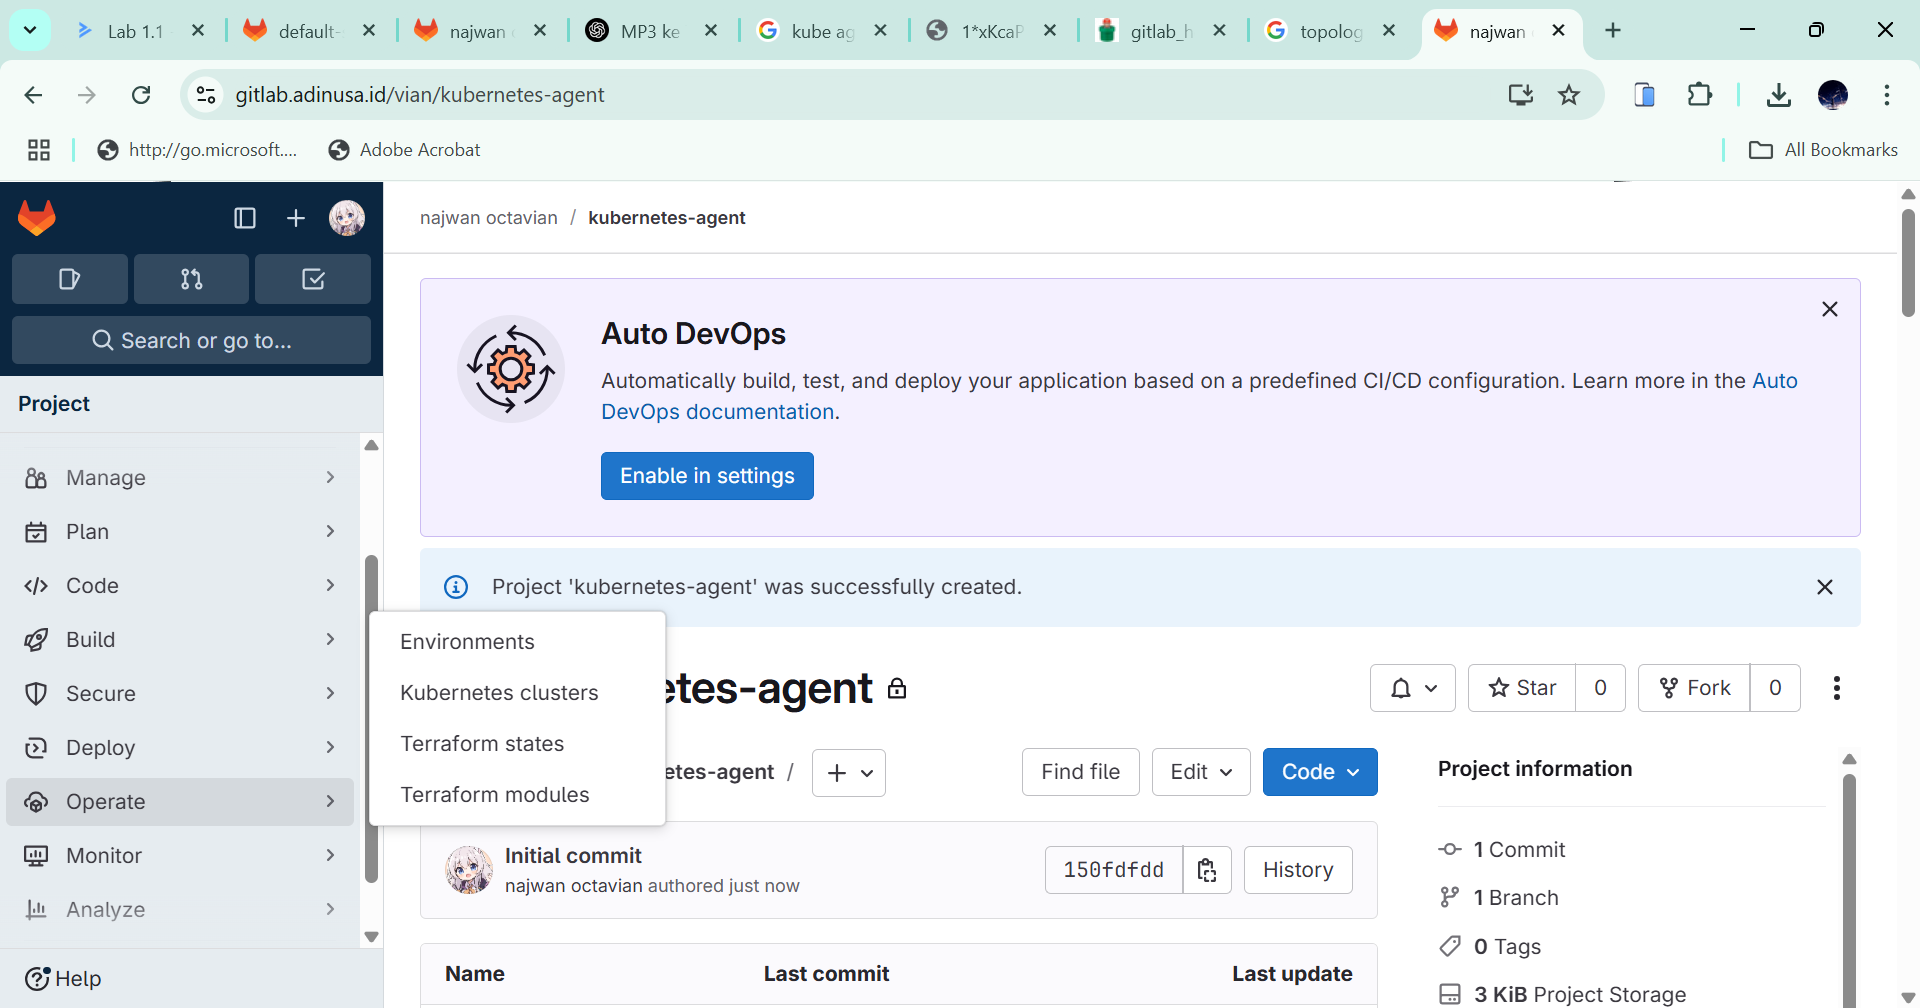
Open Operate -> Kubernetes cluster.
-
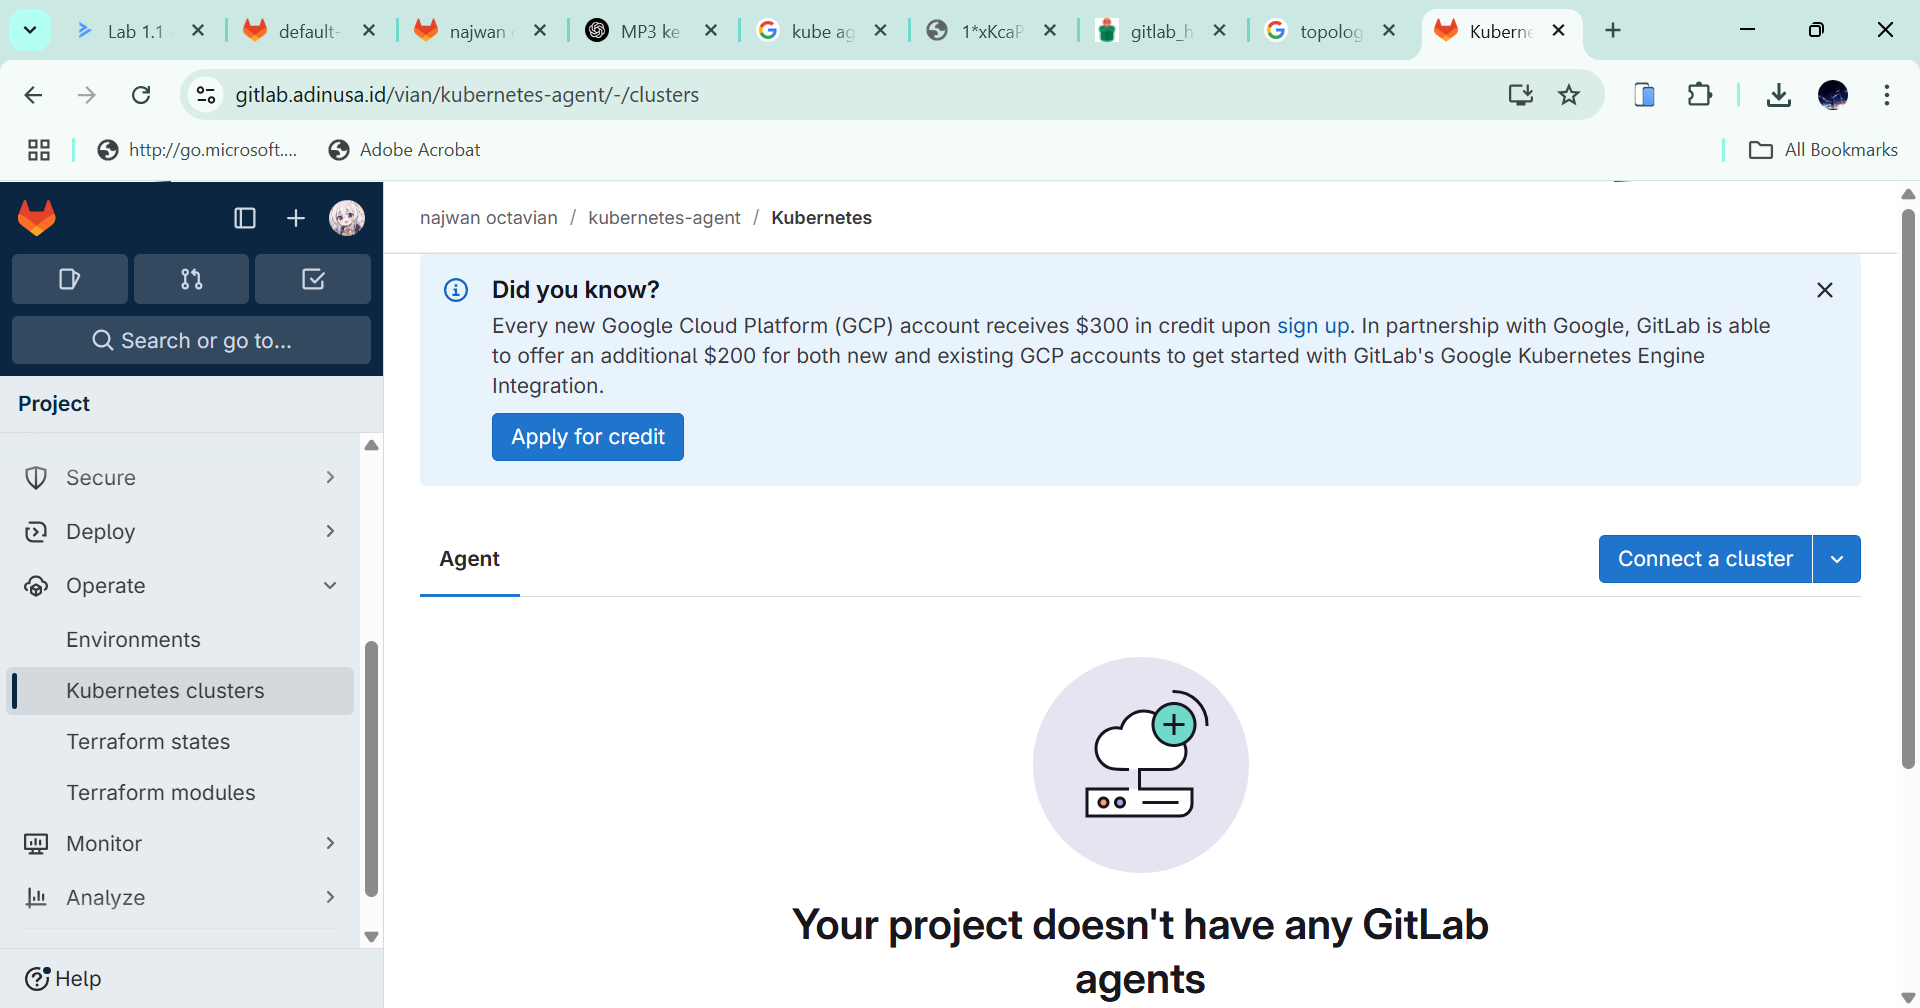
Select "Connect a cluster" to connect the Kubernetes cluster from GitLab.
-
Select "Option 2" and enter a name, such as
kube-agent.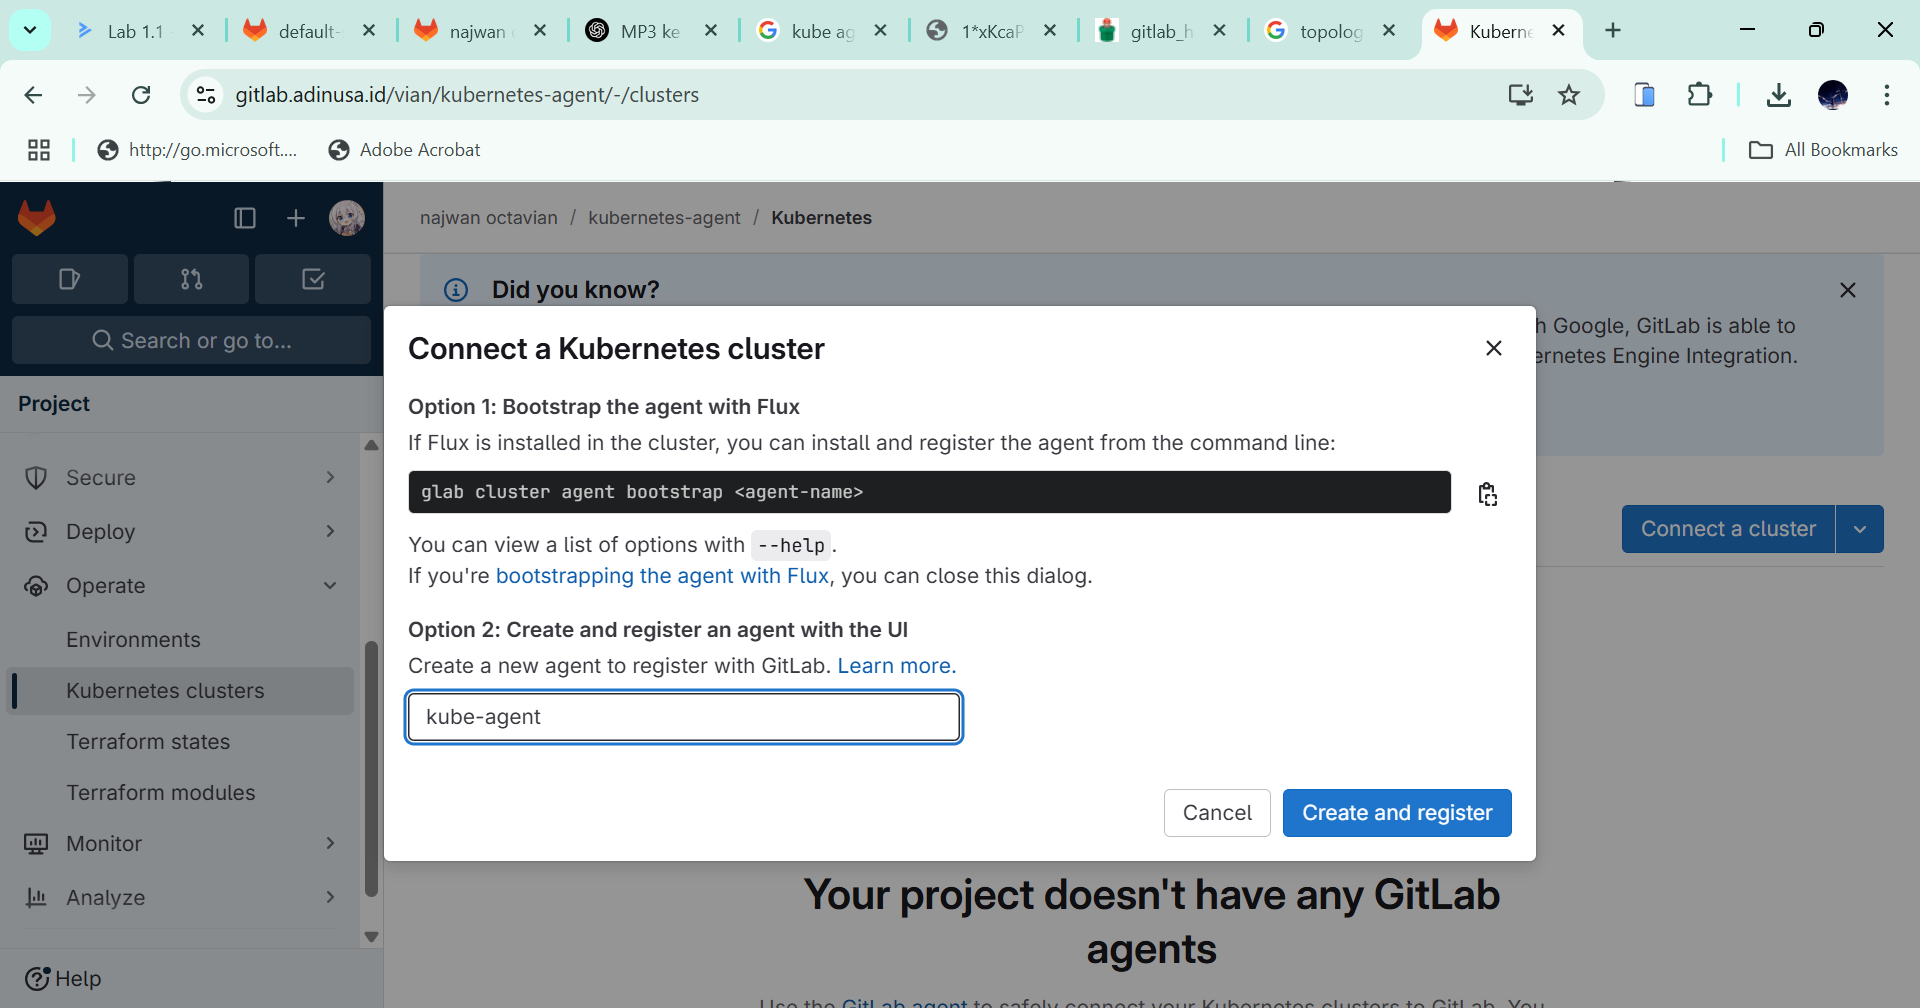
-
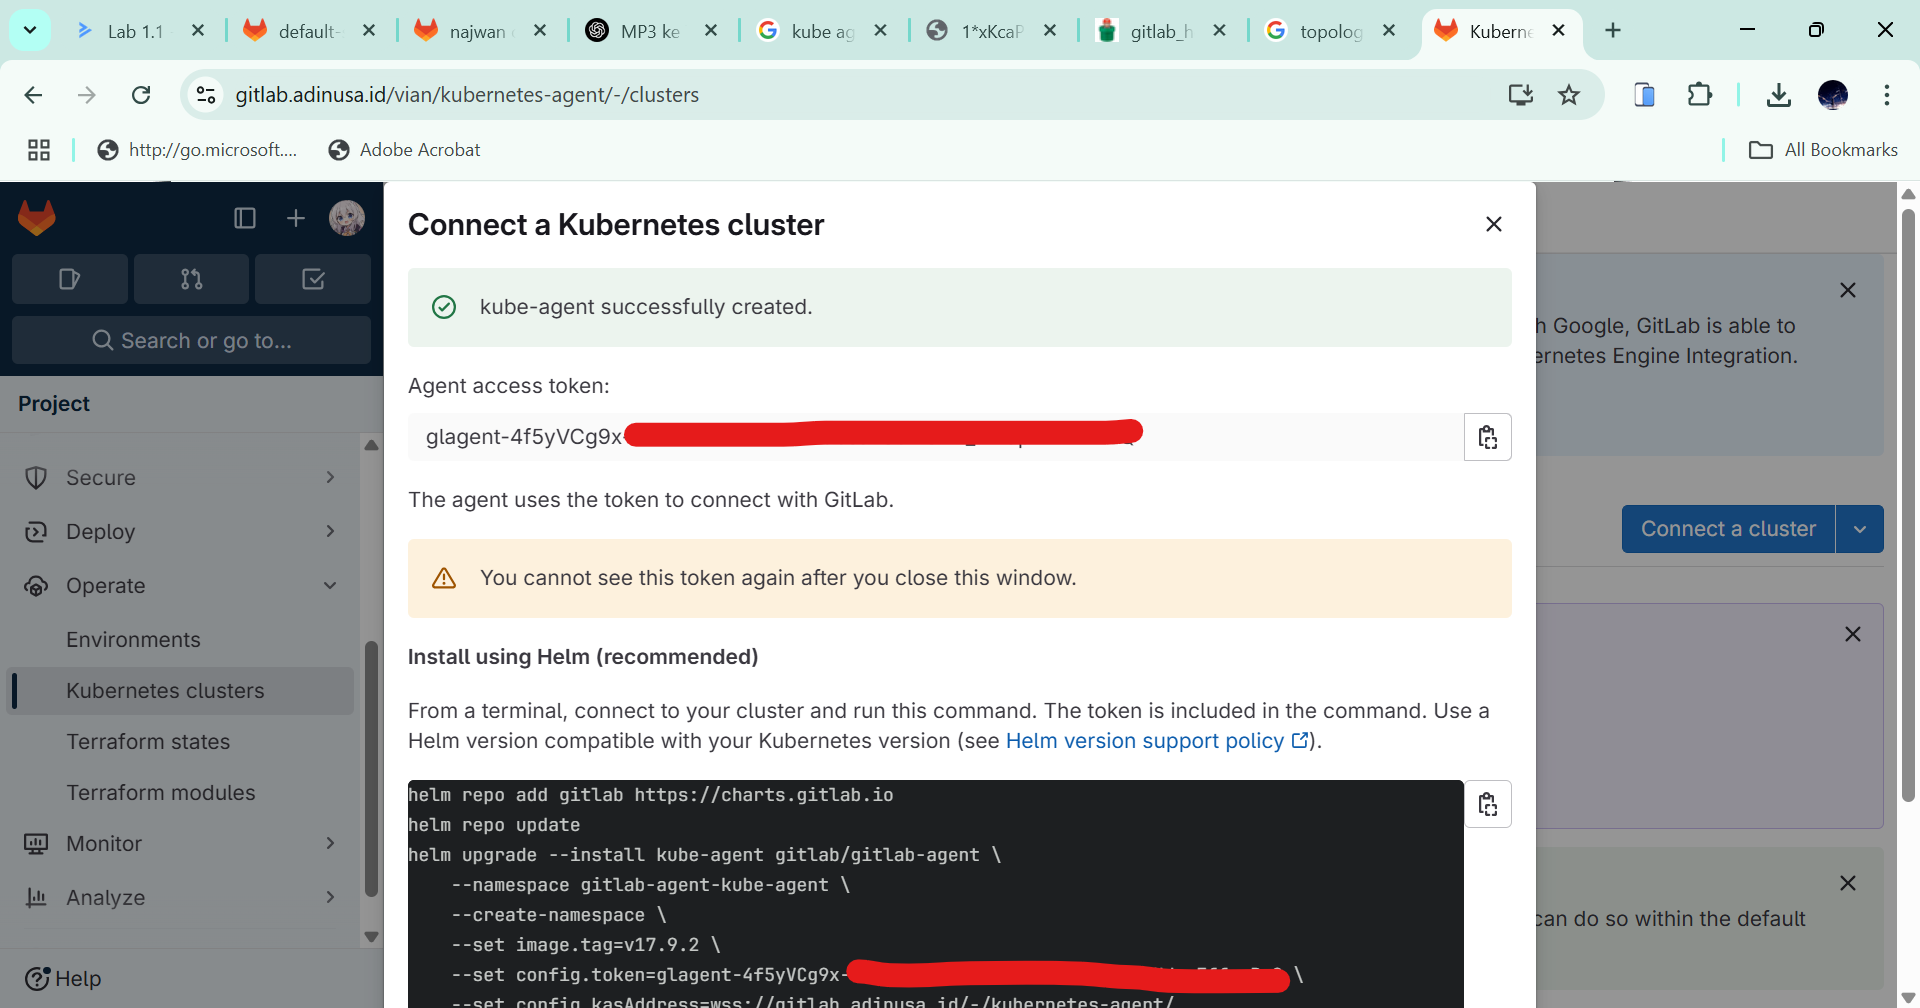
GitLab displays an "Agent access token". Store it securely; it is required to connect to the cluster.
-
Create the agent configuration directory in the project. Use the path shown in GitLab, such as
.gitlab/agent/<name-cluster>/config.yaml; the name depends on the cluster configuration.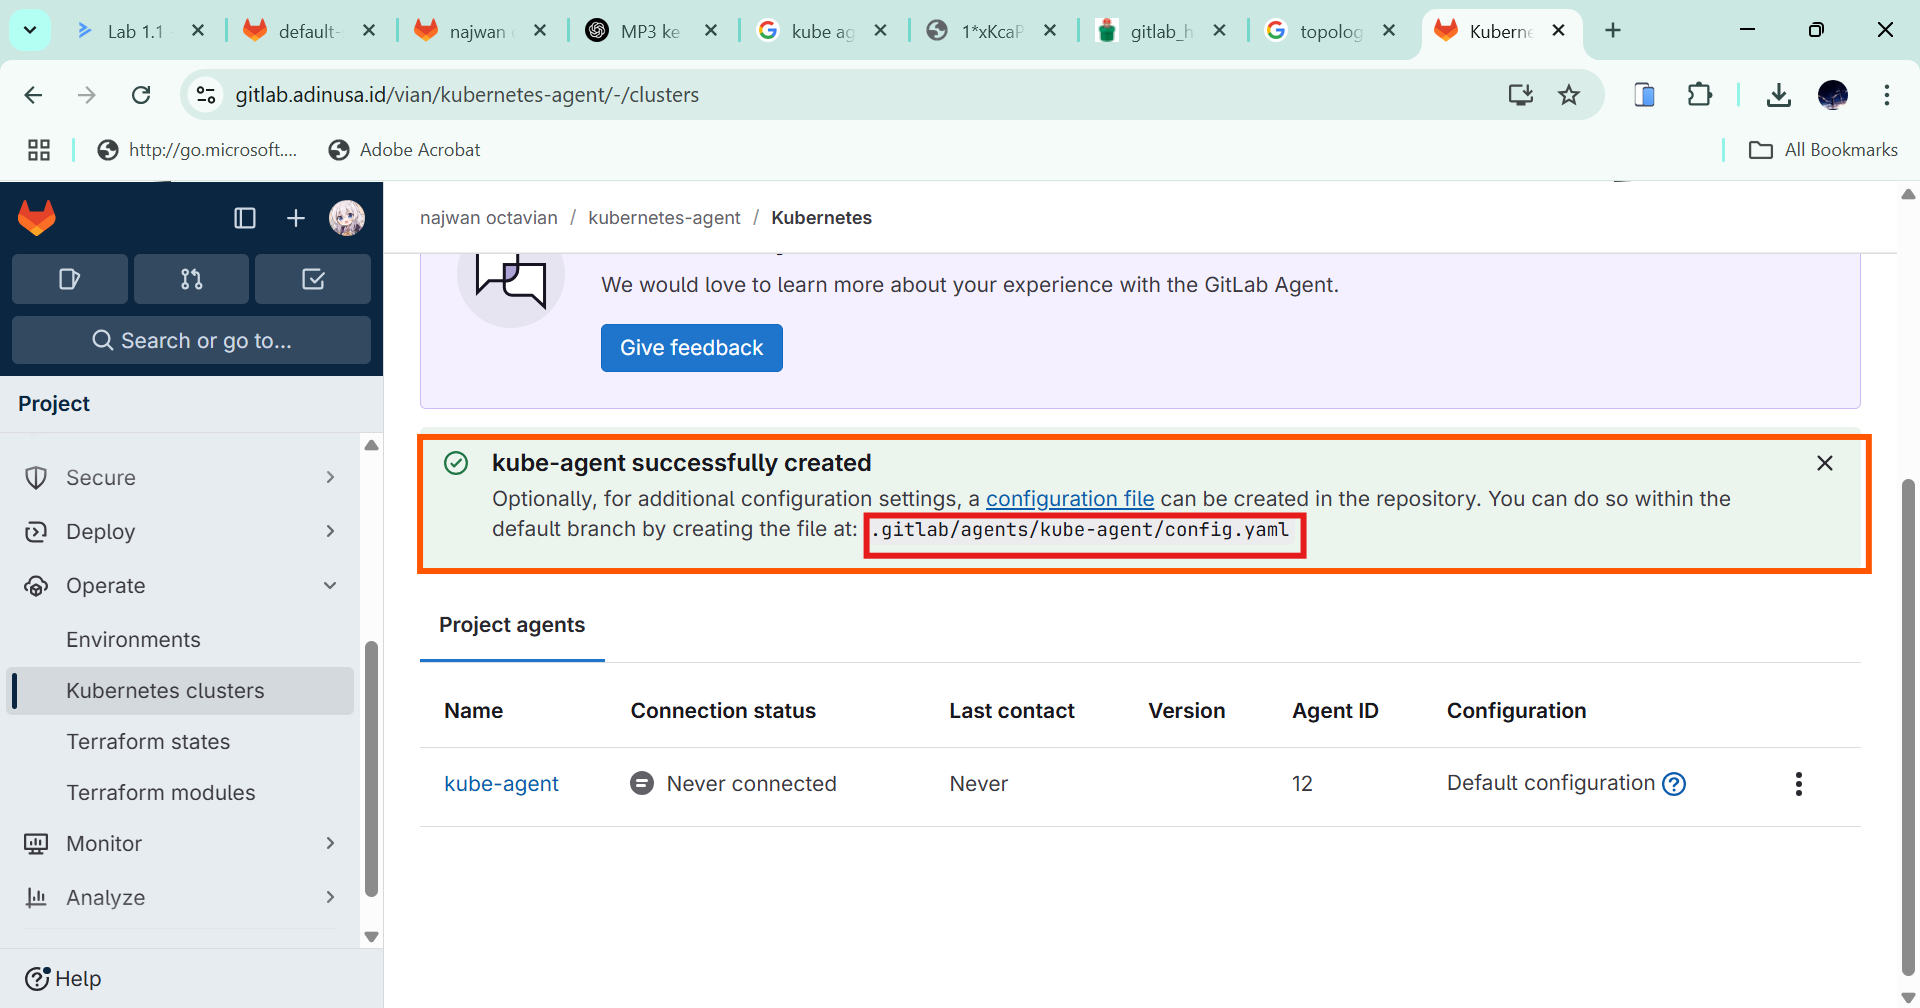
-
Configure
config.yamlas follows:user_accesscontrols which GitLab users can access Kubernetes.agent: {}grants the agent unrestricted access in this example.- The first
projectentry defines the GitLab project allowed to use the agent. ci_accesscontrols which projects can use the CI/CD integration.- The second
projectentry defines the CI project. default_namespacesets the namespace used by the pipeline.
yamluser_access: access_as: agent: {} projects: - id: vian/kube-agent ci_access: projects: - id: vian/kube-agent default_namespace: gitlab-agent
Create an Access Token
-
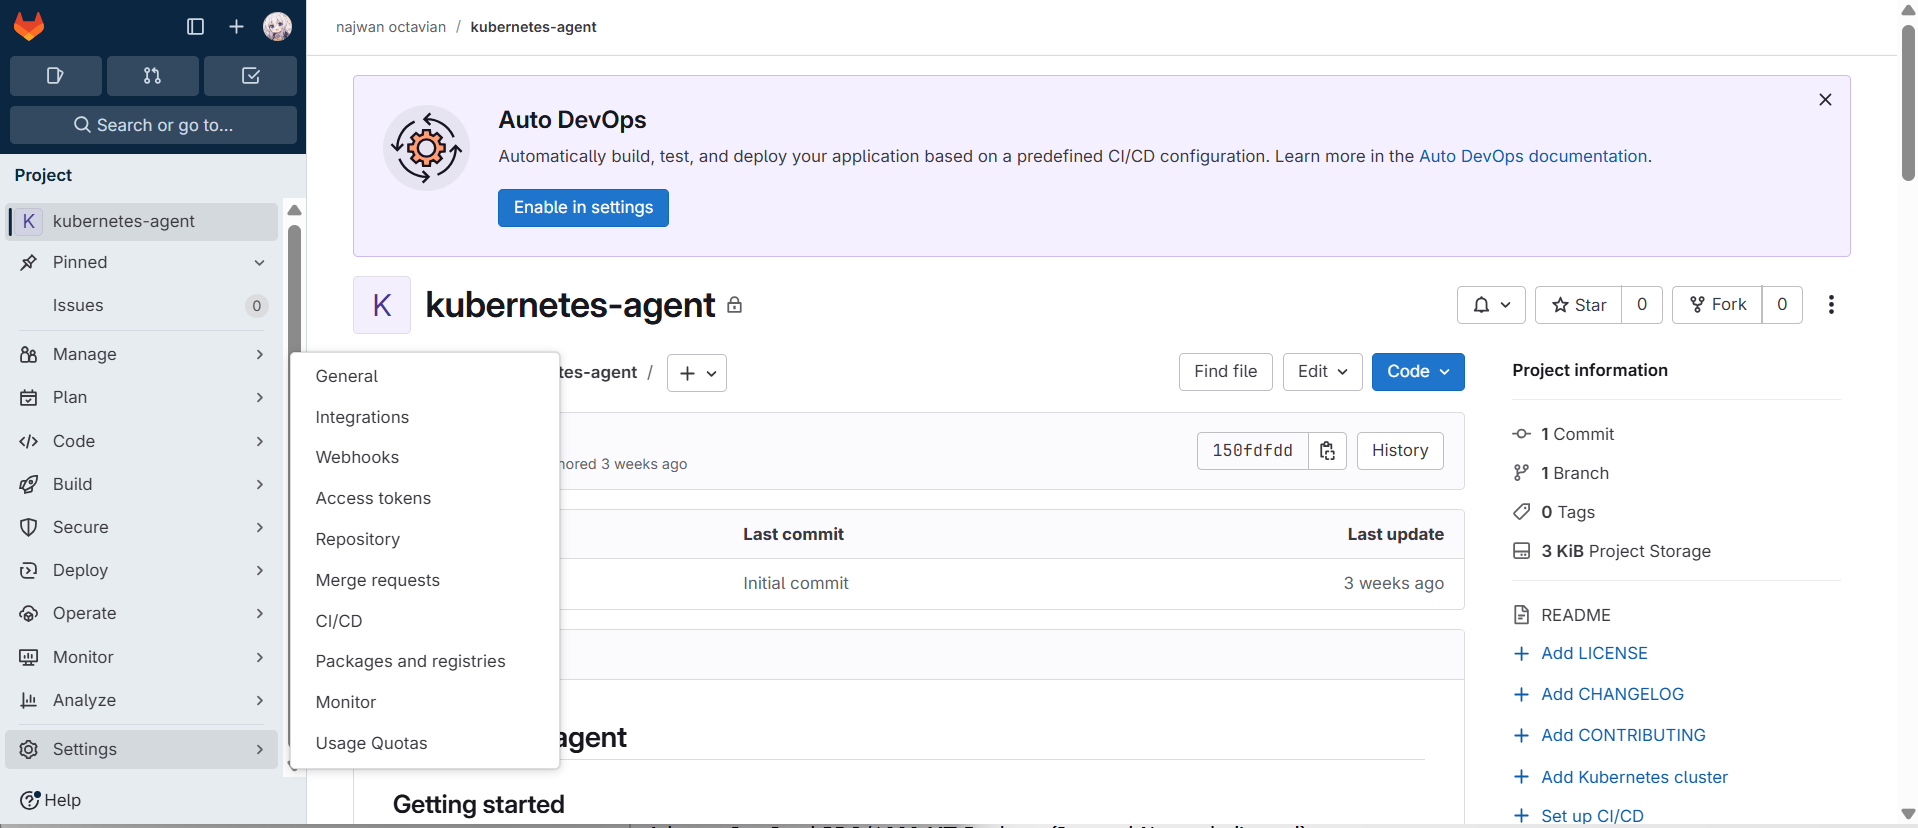
Open Settings -> Access Token in the left sidebar.
-
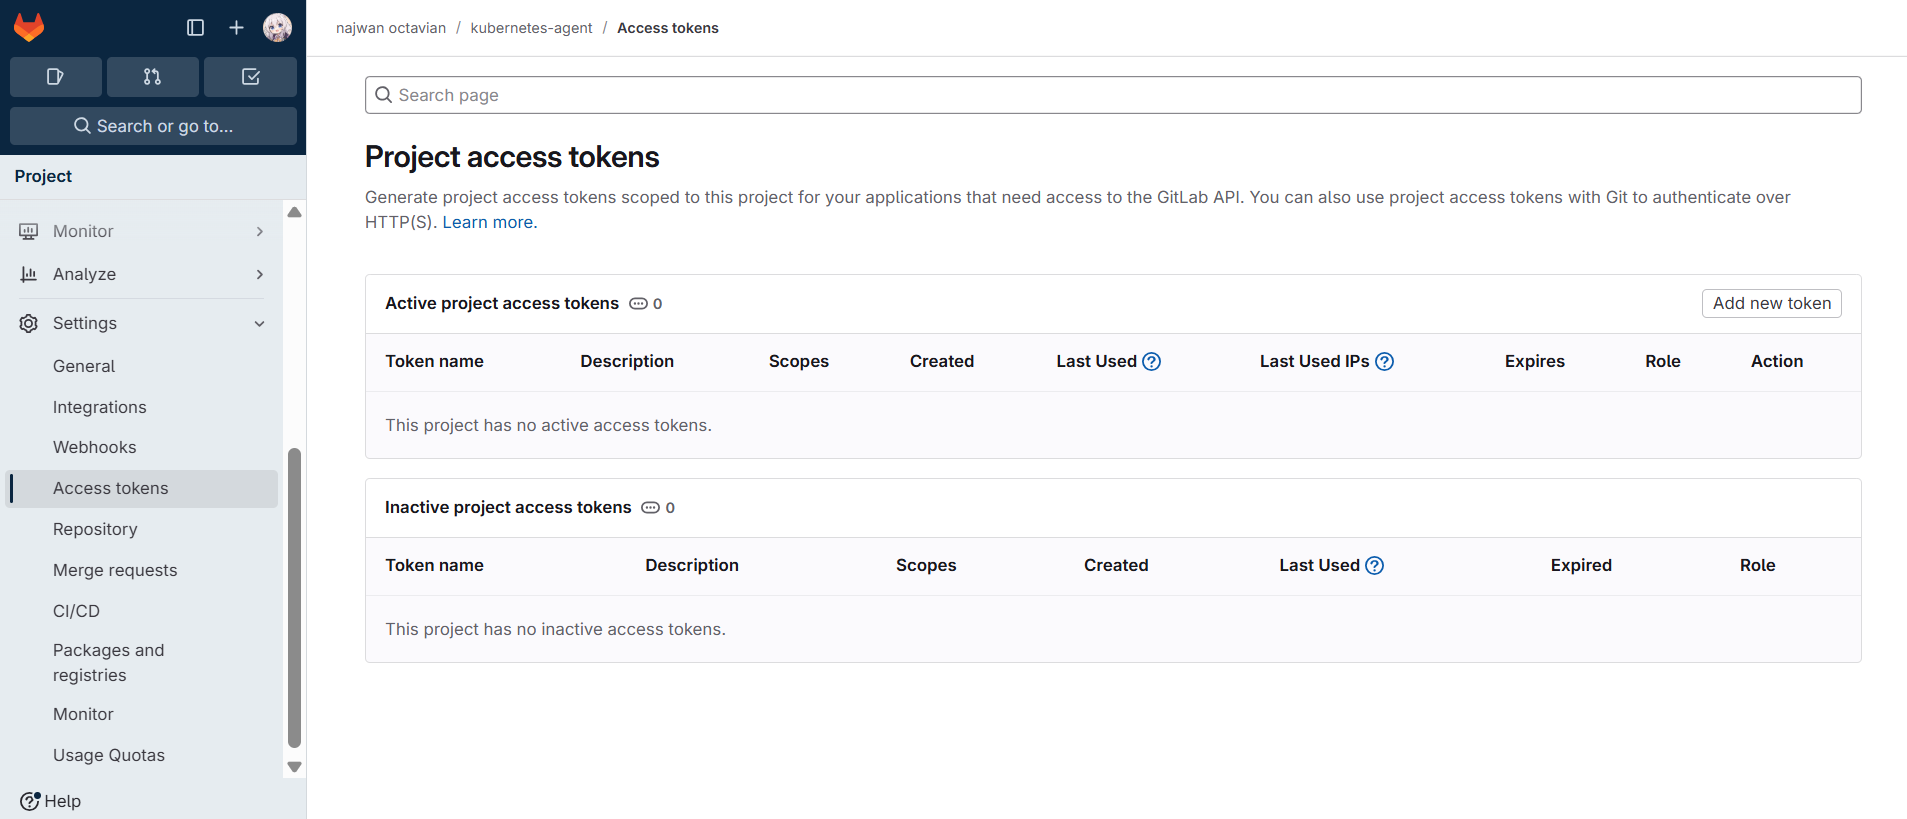
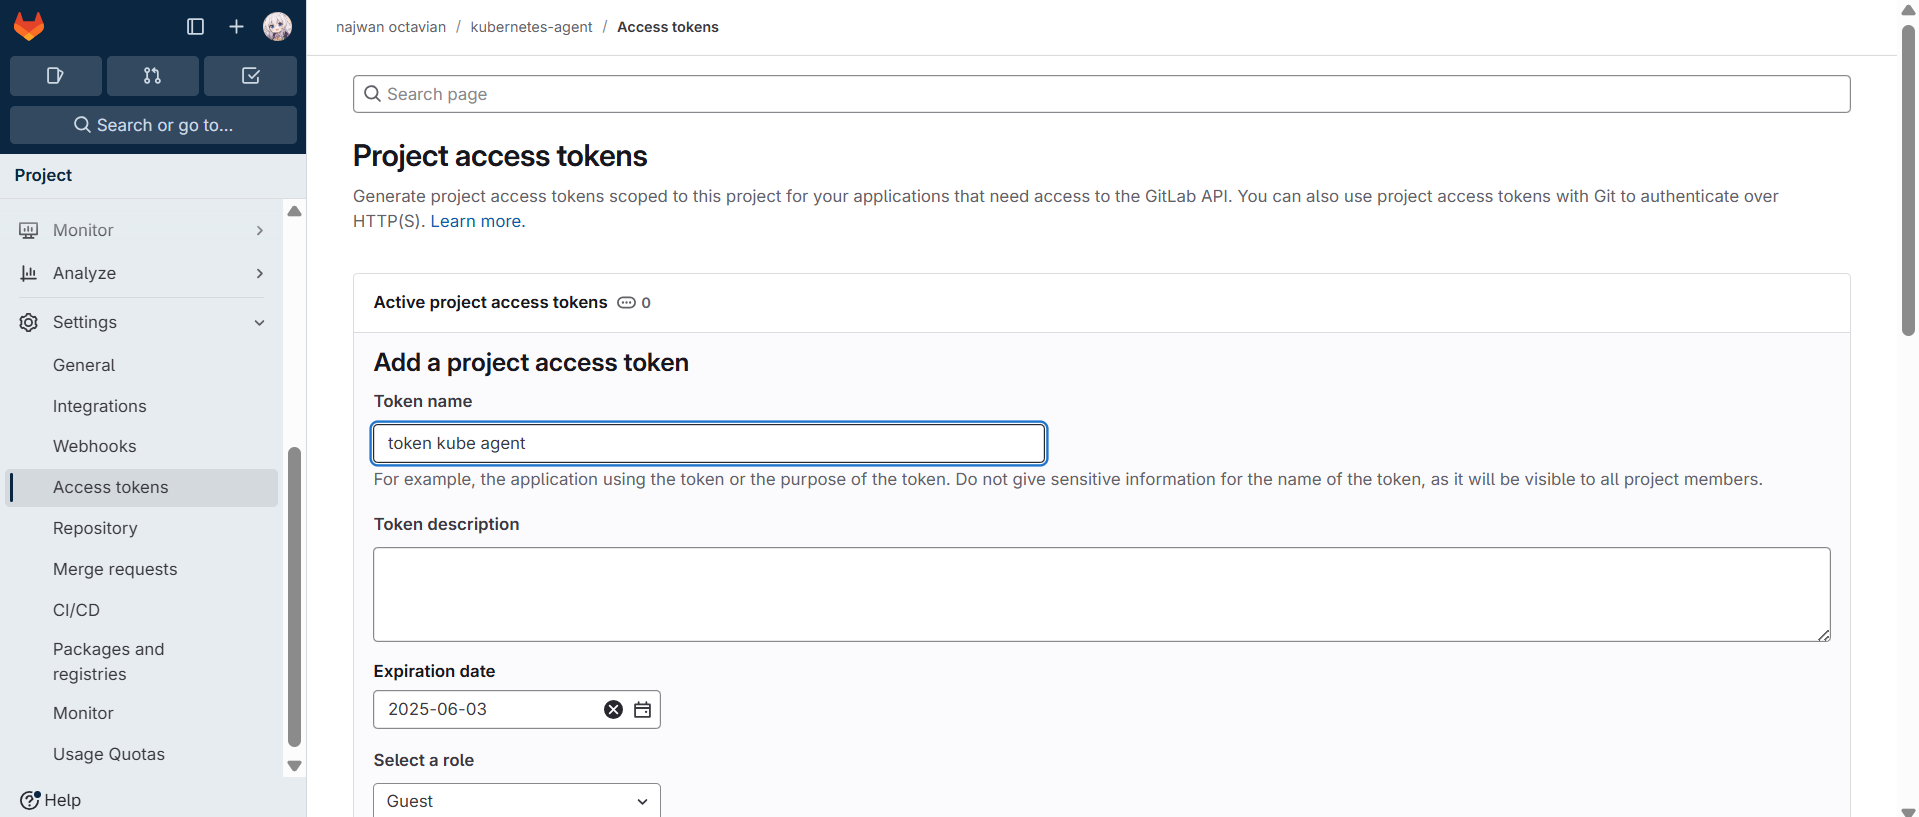
Select "Add new token" to create a token for CLI access to GitLab and the Kubernetes workflow.
-
Give the access token a descriptive name.
-
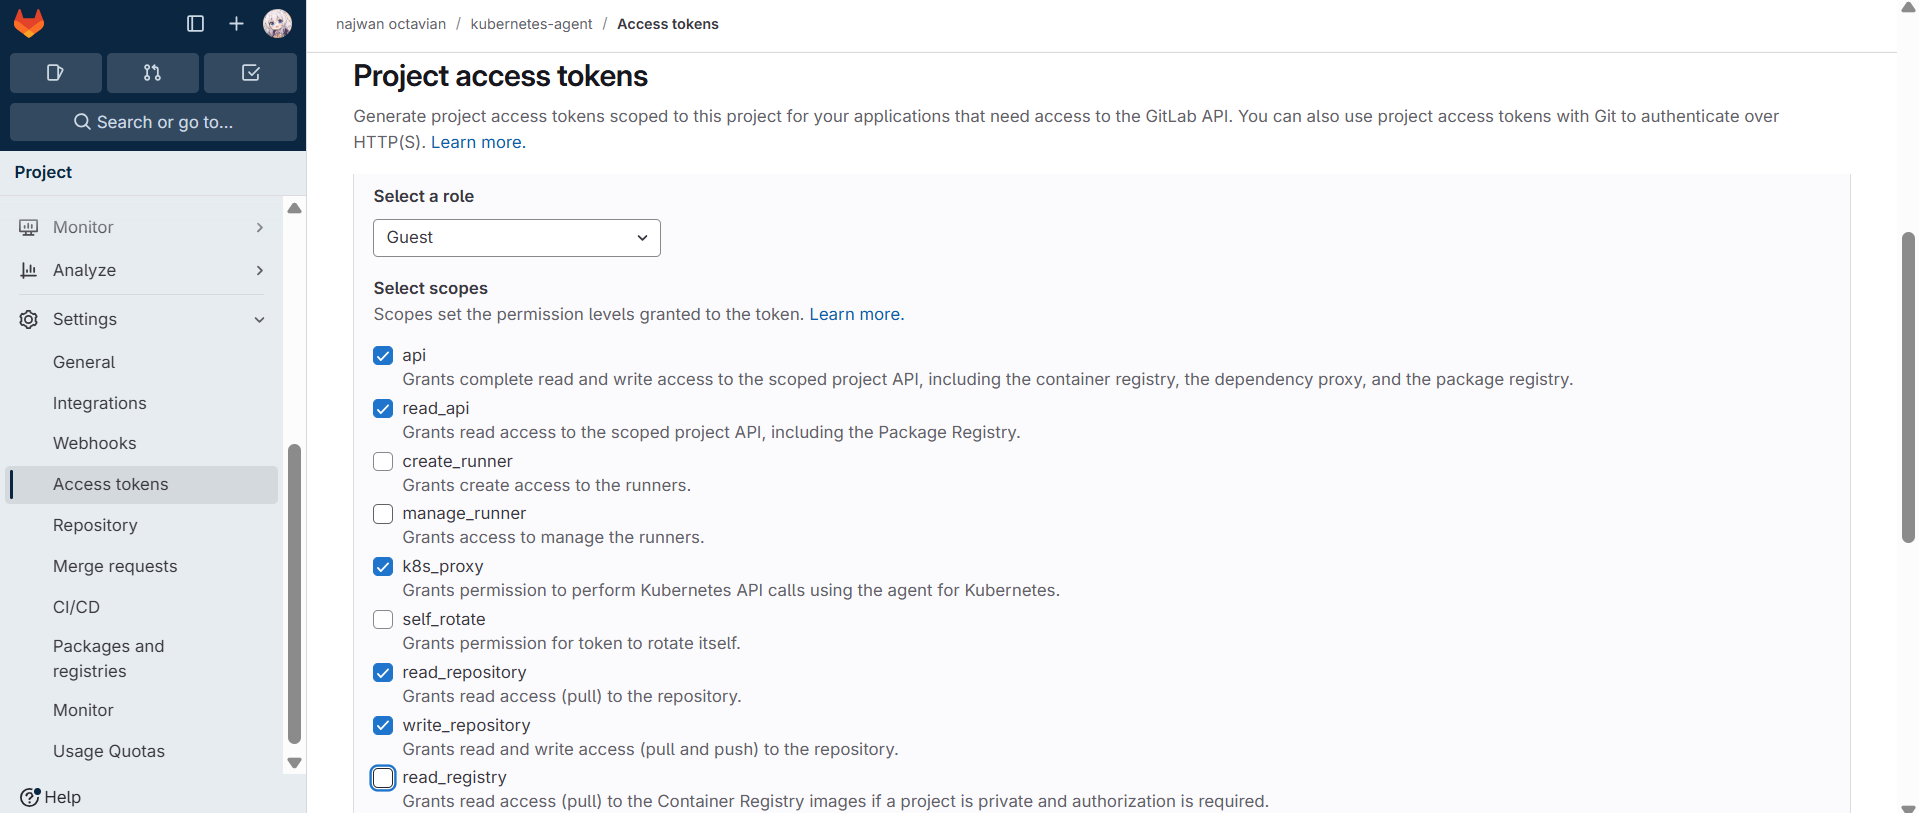
Under "Select scopes", grant
apiandwrite_repository. In this example, I also enable:- "read_api"
- "k8s_proxy"
- "read_repository"
-
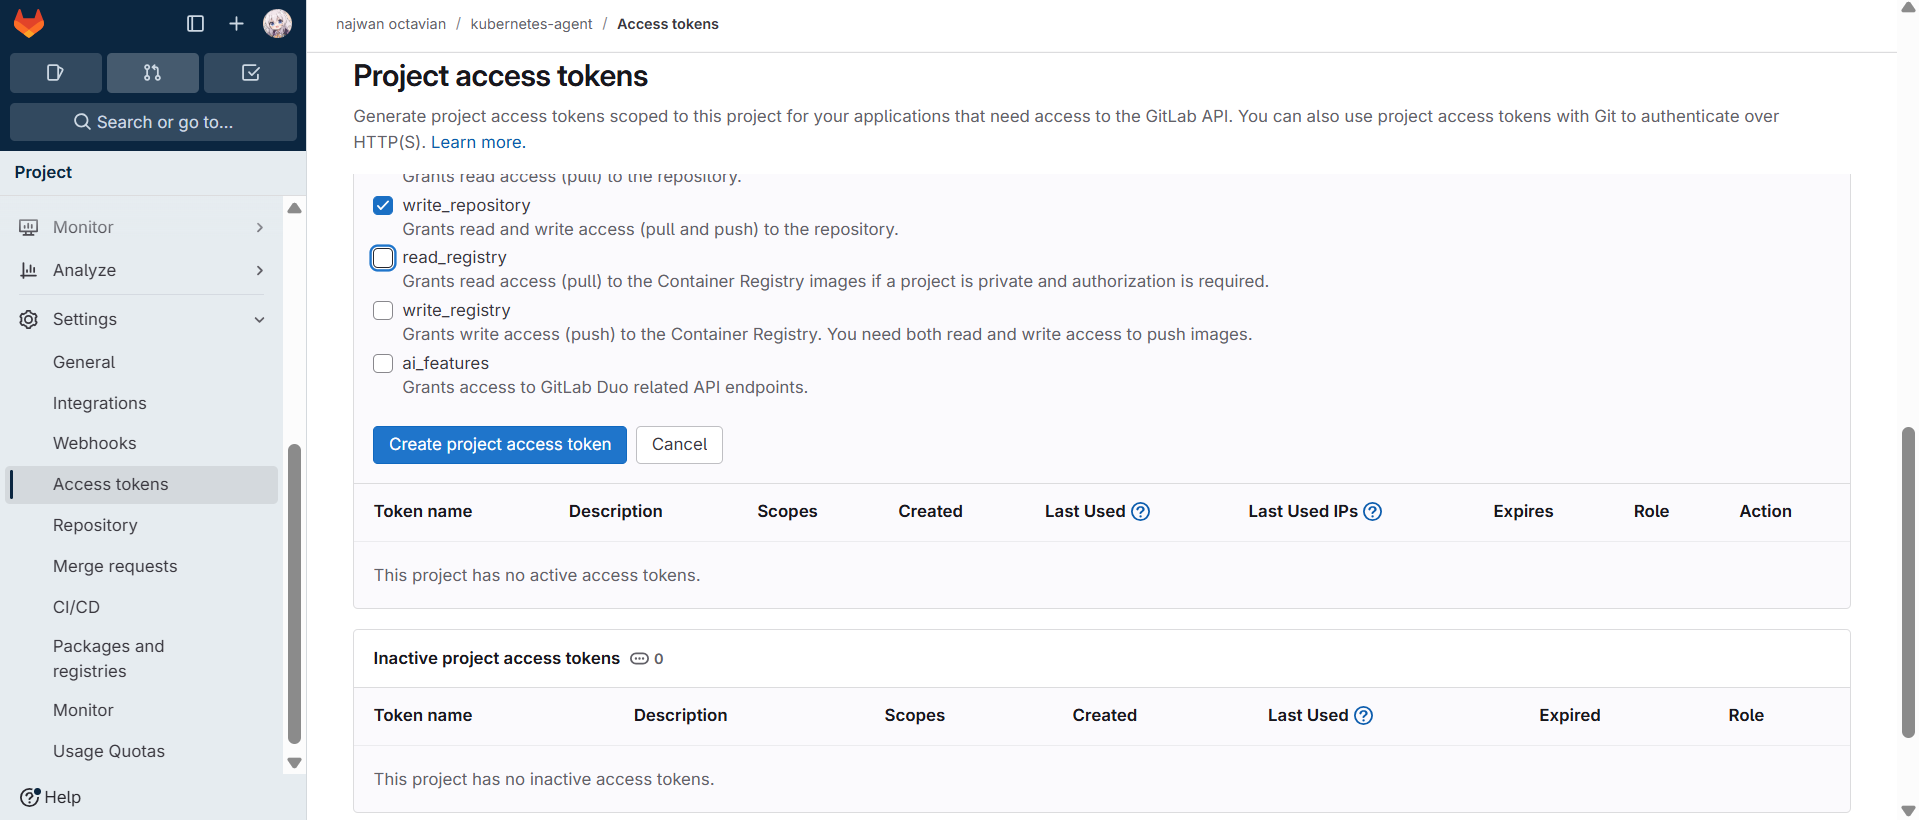
Select "Create project access token".
-
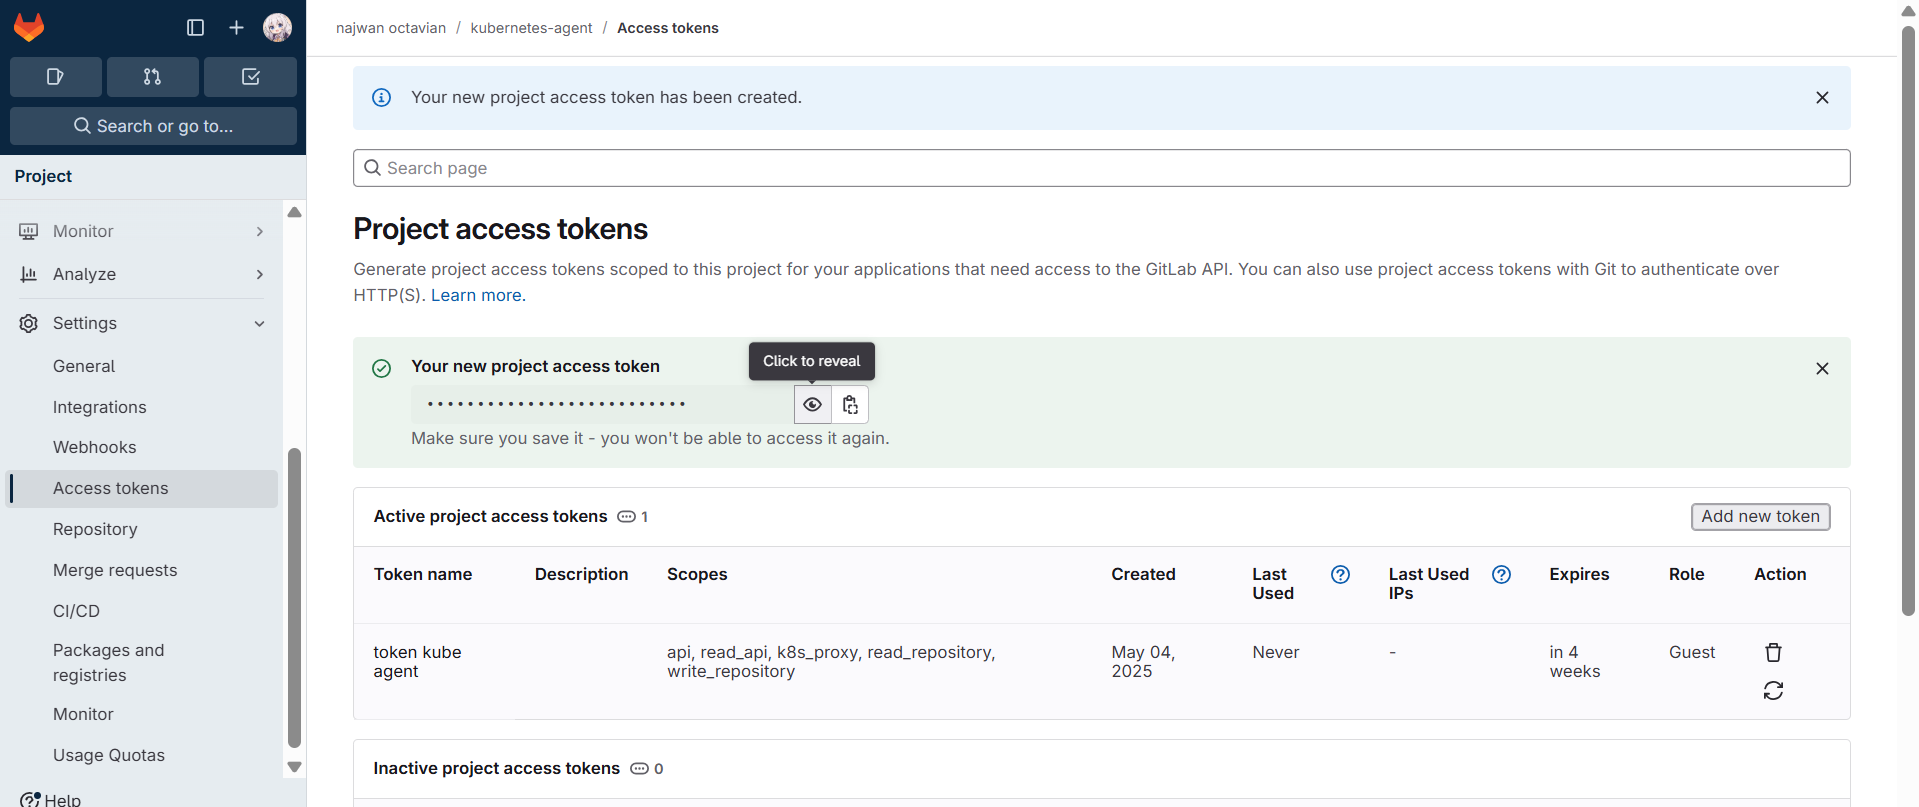
GitLab displays the token once. Copy it and store it securely; it will be used to authenticate the CLI.
3. Log in to GitLab through the CLI
-
Run the GitLab CLI login flow and select "GitLab Self-hosted Instance" for this example.
bash$ glab auth login ? What GitLab instance do you want to log into? [Use arrows to move, type to filter] gitlab.com > GitLab Self-hosted Instance- Enter the GitLab hostname. This example uses
gitlab.adinusa.id; replace it with your own host.
bash? What GitLab instance do you want to log into? GitLab Self-hosted Instance ? GitLab hostname: gitlab.adinusa.id- Choose "Token" as the authentication method.
bash? How would you like to sign in? [Use arrows to move, type to filter] > Token Web- Paste the GitLab access token when prompted.
bashTip: generate a Personal Access Token at https://gitlab.adinusa.id/-/profile/personal_access_tokens?scopes=api,write_repository. The minimum required scopes are 'api' and 'write_repository'. ? Paste your authentication token:- Select "HTTPS" as the default Git protocol.
bash? Choose default Git protocol: [Use arrows to move, type to filter] SSH > HTTPS HTTP- Select "HTTPS" for the API protocol as well.
bash? Authenticate Git with your GitLab credentials? Yes ? Choose host API protocol: [Use arrows to move, type to filter] > HTTPS HTTP- A successful response confirms that the CLI is authenticated to the GitLab project.
bash- glab config set -h gitlab.adinusa.id git_protocol https ✓ Configured Git protocol. - glab config set -h gitlab.adinusa.id api_protocol https ✓ Configured API protocol. ✓ Logged in as project_765_bot_ce6b24221b39aa6436b1ca36dc8bfb1c - Enter the GitLab hostname. This example uses
4. Create a Kubernetes ServiceAccount
The GitLab CI/CD pipeline needs a ServiceAccount bound to the GitLab Runner. Use one of the following access patterns.
-
For namespace-scoped access, use the configuration below and replace
<namespace>with the target namespace.yamlapiVersion: v1 kind: ServiceAccount metadata: name: gitlab-runner namespace: <nama_namespace> apiVersion: rbac.authorization.k8s.io/v1 kind: Role metadata: name: gitlab-runner namespace: <nama_namespace> rules: - apiGroups: [""] resources: ["pods", "services", "configmaps", "secrets"] verbs: ["get", "list", "watch", "create", "update", "delete"] - apiGroups: ["apps"] resources: ["deployments", "replicasets"] verbs: ["get", "list", "watch", "create", "update", "delete"] - apiGroups: ["networking.k8s.io"] resources: ["ingresses"] verbs: ["get", "list", "watch", "create", "update", "delete"] apiVersion: rbac.authorization.k8s.io/v1 kind: RoleBinding metadata: name: gitlab-runner-binding namespace: <nama_namespace> roleRef: apiGroup: rbac.authorization.k8s.io kind: Role name: gitlab-runner subjects: - kind: ServiceAccount name: gitlab-runner namespace: <nama_namespace> -
For access across every namespace in the cluster, use the configuration below.
yamlapiVersion: v1 kind: ServiceAccount metadata: name: gitlab-runner namespace: kube-system apiVersion: rbac.authorization.k8s.io/v1 kind: ClusterRoleBinding metadata: name: gitlab-runner-binding roleRef: apiGroup: rbac.authorization.k8s.io kind: ClusterRole name: cluster-admin subjects: - kind: ServiceAccount name: gitlab-runner namespace: kube-system
5. Create the Kube Agent with Helm
-
Add the GitLab Helm repository and update the local index.
bashhelm repo add gitlab https://charts.gitlab.io helm repo update -
Install the GitLab Kube Agent with these settings:
- Set the target namespace with
--namespace <namespace>. Add--create-namespaceif Helm should create it. - Change
--set image.tag=to use a different agent image tag. - Set
--set config.token=to the token that connects the cluster to GitLab. - Set
--set config.kasAddress=to the KAS address for the GitLab instance. - Set
--set serviceAccount.name=to the existing ServiceAccount. - Use
--set serviceAccount.create=falseand--set rbac.create=falseso Helm reuses the existing access configuration.
Example:
bashhelm upgrade --install test gitlab/gitlab-agent \ --namespace gitlab-agent \ --create-namespace \ --set image.tag=v17.9.2 \ --set config.token=glagent-GD-********** \ --set config.kasAddress=wss://gitlab.adinusa.id/-/kubernetes-agent/ \ --set rbac.create=false \ --set serviceAccount.name=gitlab-runner \ --set serviceAccount.create=false - Set the target namespace with
6. Create the GitLab Runner with Helm
-
Install the GitLab Runner and adjust the following values:
- Set
--namespaceto the target namespace, such asgitlab-runner. - Set
--set gitlabUrl=to the GitLab URL, such ashttps://gitlab.adinusa.id. - Replace
<RUNNER-TOKEN>with the runner token created in GitLab. - Set
--set serviceAccount.name=to the existing ServiceAccount, such asgitlab-runner. - Set
--set serviceAccount.create=falseand--set rbac.create=falseto reuse the existing permissions.
Example:
bashhelm upgrade --install gitlab-runner gitlab/gitlab-runner \ --namespace gitlab-runner \ --set gitlabUrl=https://gitlab.adinusa.id \ --set runnerToken=<RUNNER-TOKEN> \ --set runners.executor="kubernetes" \ --set rbac.create=false \ --set serviceAccount.name=gitlab-runner \ --set serviceAccount.create=false - Set
7. Verify the GitLab Runner
-
Check the ServiceAccount used by the runner pod. Adjust the
-nnamespace if your deployment uses a different one.bashkubectl get pod -n gitlab-runner -l app=gitlab-runner -o jsonpath="{.items[*].spec.serviceAccountName}" -
Check the ServiceAccount in the Helm manifest. Adjust the namespace if necessary.
bashhelm get manifest gitlab-runner -n gitlab-runner | grep serviceAccountName -A 2 -
Test the ServiceAccount permissions. The expected output is
yes, which confirms that the runner can access pods.bashkubectl auth can-i get pods --as=system:serviceaccount:gitlab-agent-test:gitlab-runner -n gitlab-runner
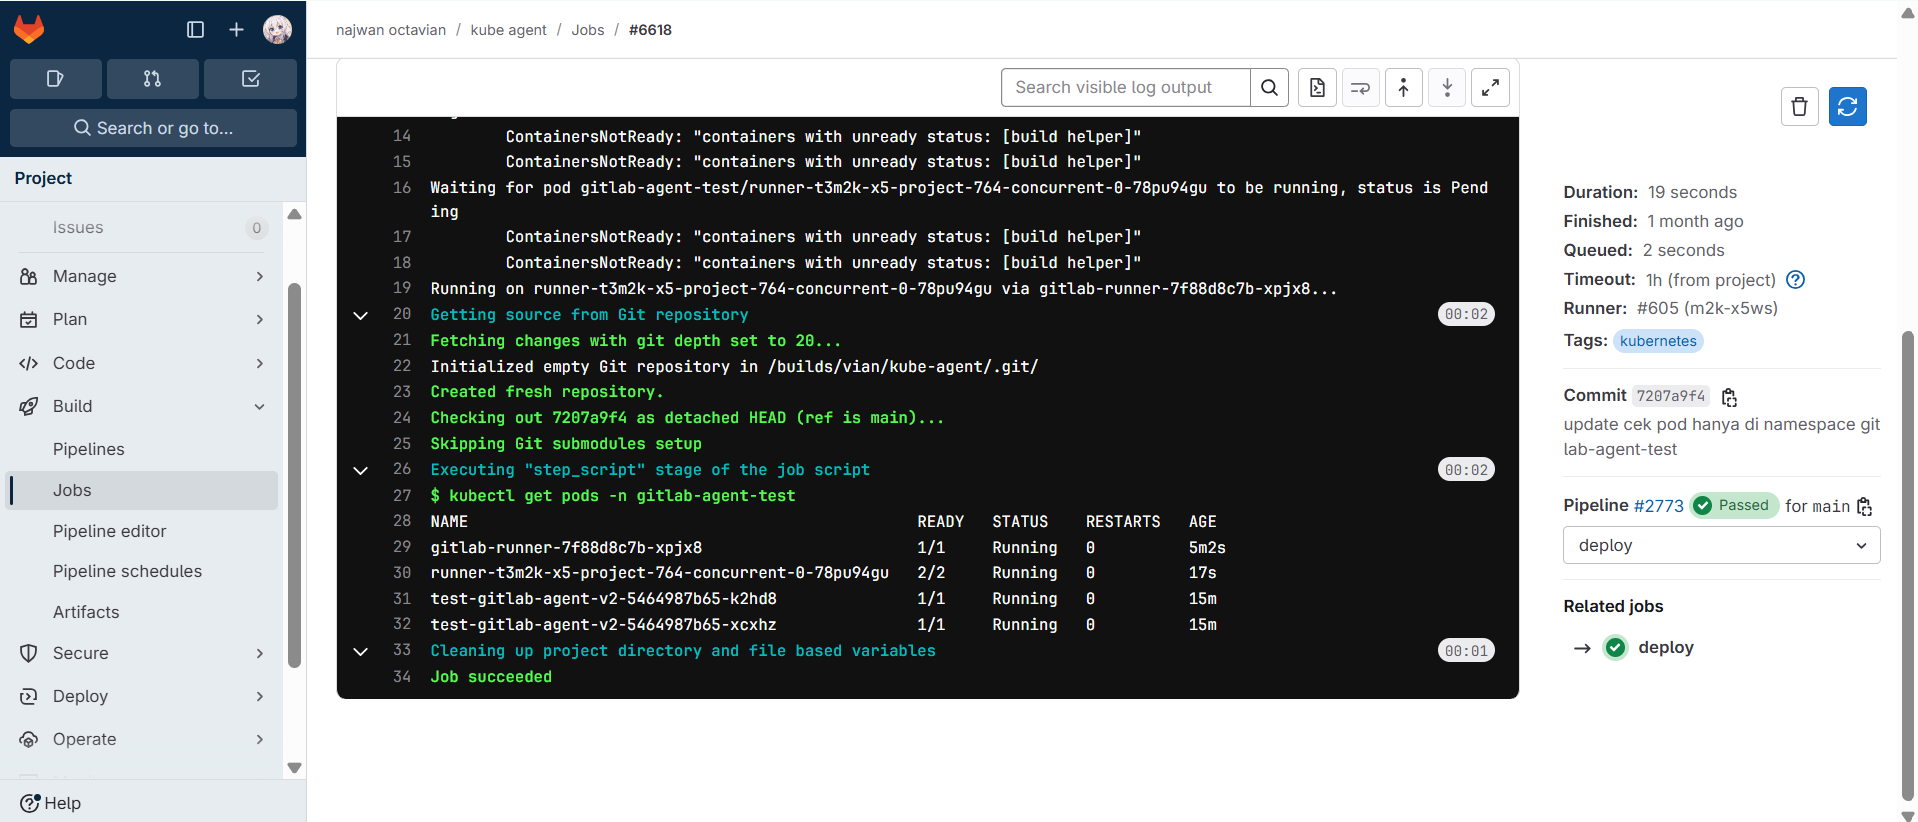
8. Test the Kube Agent and GitLab Runner
-
Run a simple GitLab CI pipeline to list the pods in the target namespace.
yamldeploy: stage: deploy image: bitnami/kubectl script: - kubectl get pods -n gitlab-agent-test tags: <runner_tags> -
A successful pipeline produces the following result.
Conclusion
Integrating the GitLab Kube Agent with KAS gives Kubernetes teams a secure way to manage clusters without exposing the API server publicly. It supports isolated network topologies, near-real-time configuration synchronization, and GitOps workflows through a single CI/CD platform.
Cloud-native adoption is not only about using the newest tools; it is about choosing solutions that match the team's security and operational requirements. GitLab Kube Agent and KAS demonstrate how a CI/CD platform and Kubernetes can work together to make DevOps delivery more efficient.